
Publish to Amazon
How to publish Amazon listings directly from Perci
Send approved listing updates from Perci to Seller Central without downloading, formatting, and troubleshooting an Amazon flat file. The same publishing flow works for one listing or a large batch.
Before you begin
What you need
- Approved listings ready in your Perci dashboard
- Access to the correct Amazon Seller Central account
- Admin permissions for the initial Amazon API connection
You only need to connect an Amazon account once. After that, the account is available for future publishing batches.
Step 1
Select the listings to publish
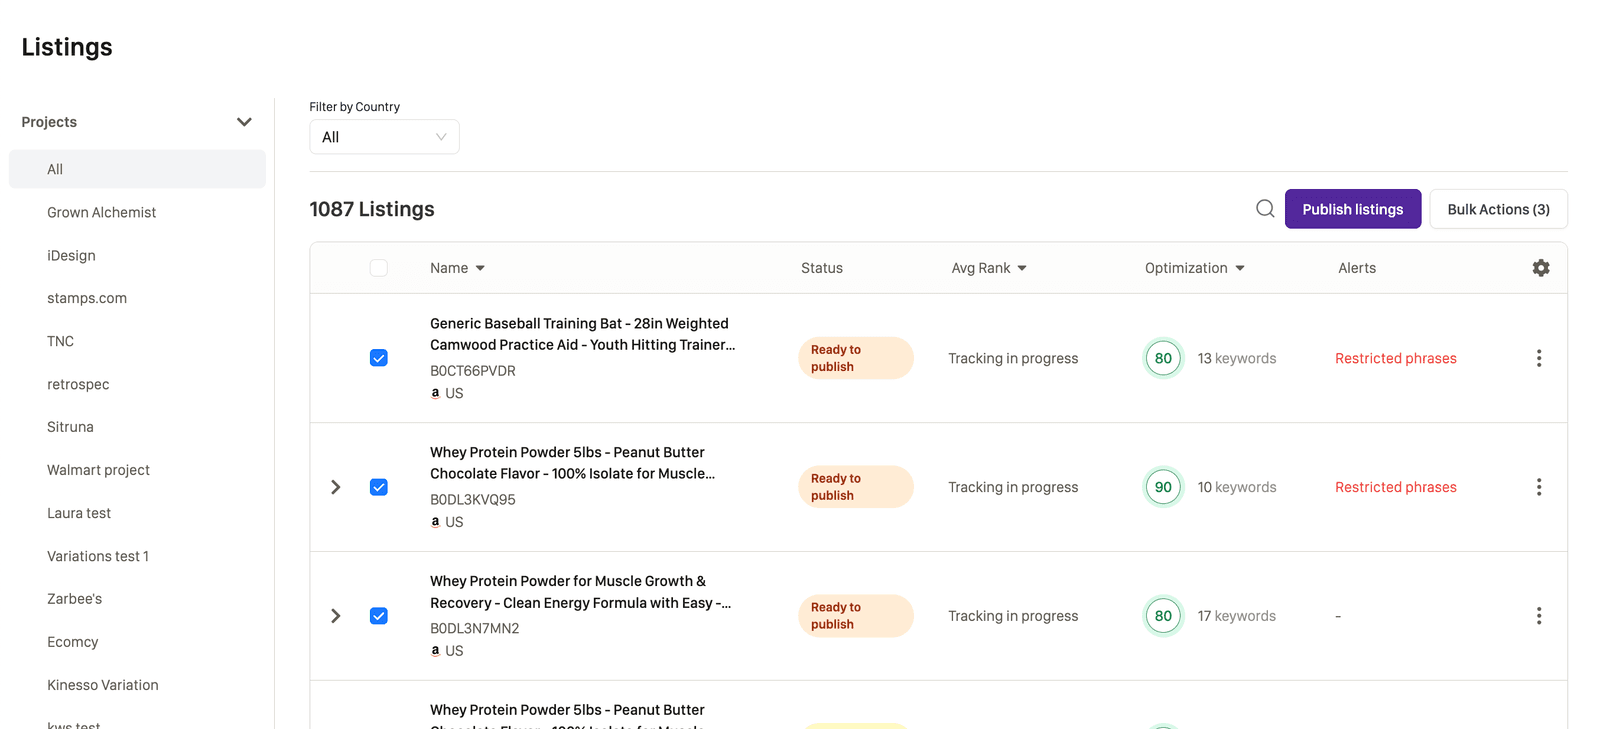
Open the listing dashboard and select the approved products you want to send to Amazon. You can publish one listing or hundreds through the same action.
Click Publish listings in the upper-right action area. If it is not the primary action shown, open Bulk Actions to find it.
Step 2
Select or connect the Amazon account
Choose the Seller Central account and marketplace that should receive the listing updates. If the account is not connected yet, start a new account sync from this screen.
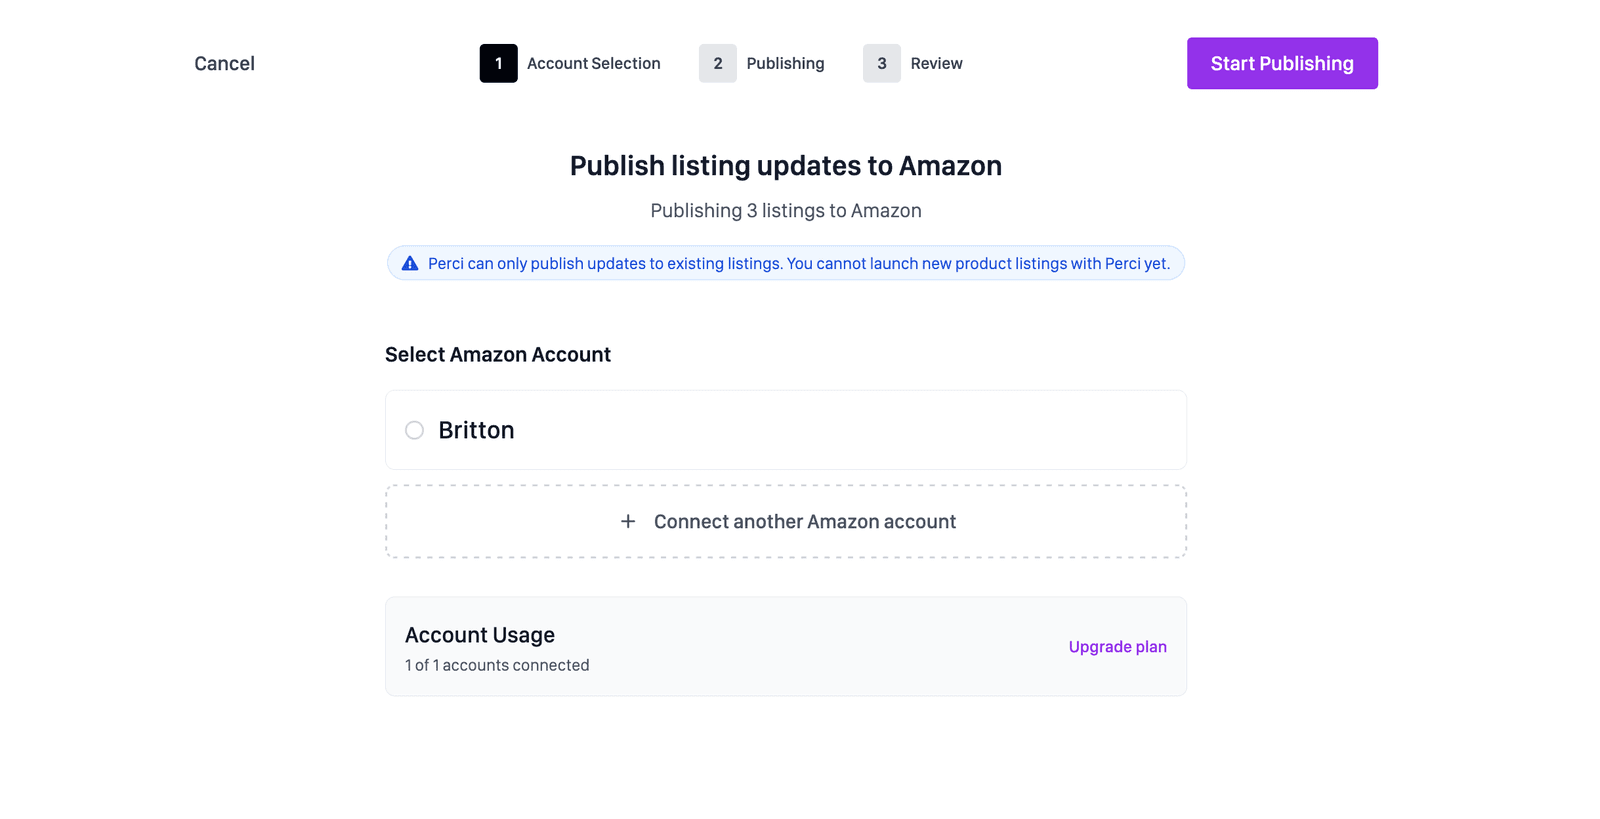
The first-time connection
- Perci redirects you to Amazon's authorization page.
- Sign in with your normal Seller Central credentials.
- Authorize Perci to manage listing data for the account.
- Amazon redirects you back to Perci with the account connected.
Step 3
Add the publishing details for new listings
If you are updating existing ASINs, continue to the next step. Perci already has the identifiers required to publish those updates.
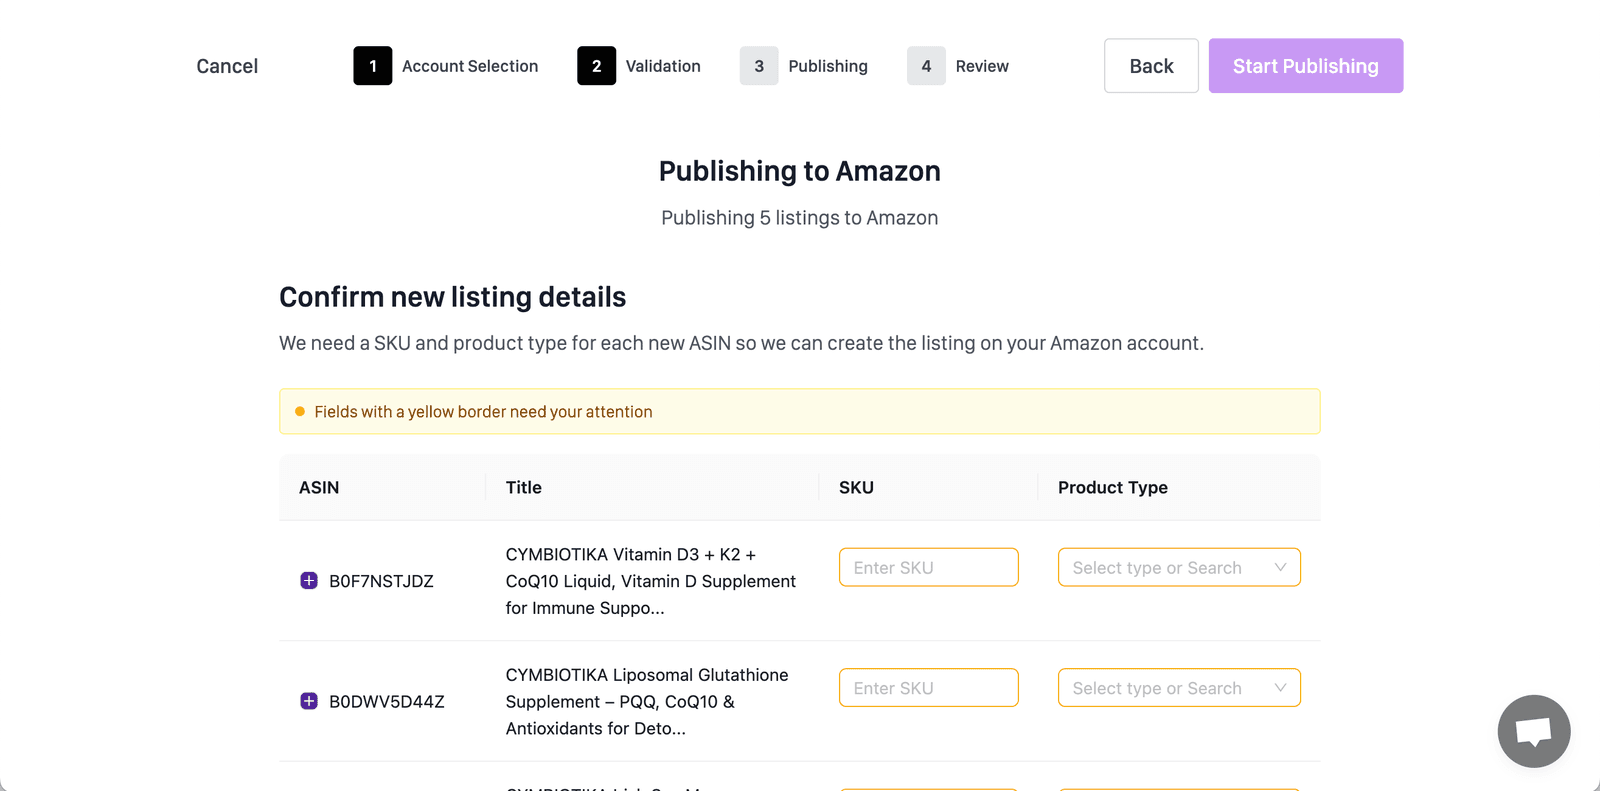
For a brand-new listing, Perci asks for the SKU and Amazon product type for each product. Enter the SKU your inventory system will use and select the product type that matches the item.
Step 4
Start publishing and follow the activity log
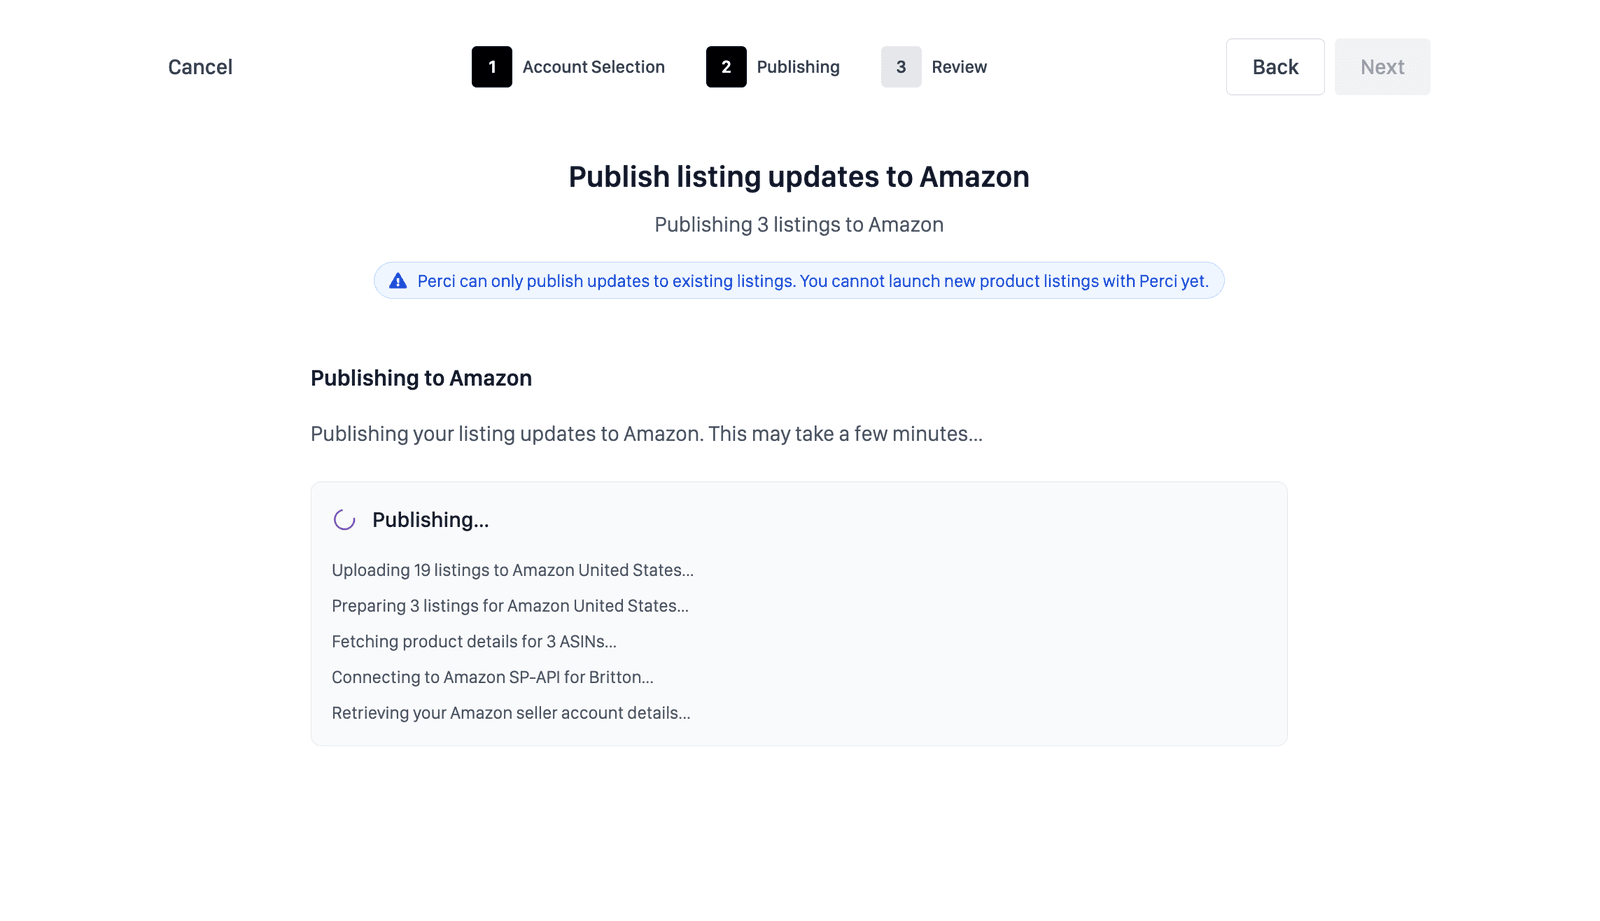
Select the connected account, confirm the batch, and click Start Publishing. Perci formats the listing data for Amazon's API and sends each listing to Seller Central.
The activity log shows which listings are processing, which Amazon accepted, and which need attention. When Amazon rejects a value, use the returned issue to correct the listing and publish it again.
Step 5
Verify the published listings
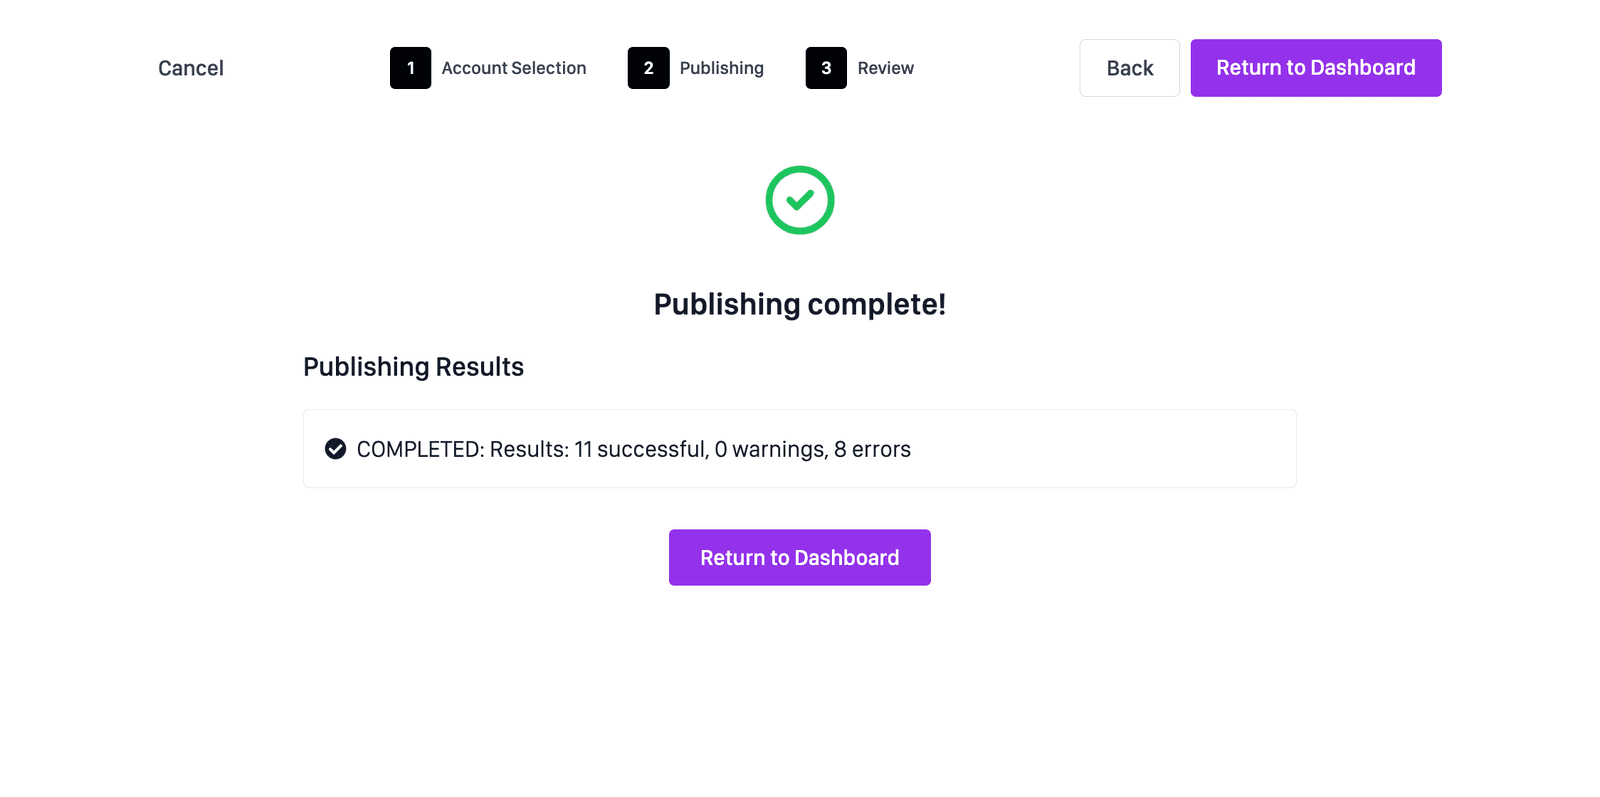
Perci marks successfully submitted listings with a published status. Check the batch in the dashboard, then confirm the updated listing data in Seller Central.
Perci monitors the product detail page for 24 hours
To help you confirm that Amazon has applied the changes to the product detail page (PDP), Perci automatically checks the live PDP against your published content over the next 24 hours.
The dashboard reports one of three outcomes for every listing:
- Fully published: The published content is live on the PDP.
- Partially published: Some content is live, but at least one field has not updated. Hover over the status to see which field is still different.
- Failed to publish: None of the published content appeared on the PDP.
If publishing problems continue, contact Perci support. The team can inspect the deeper publishing activity and help determine what is preventing the listing changes from going live correctly.
Existing listings
Amazon can show the updated backend data in Seller Central before the customer-facing product page changes. Allow time for Amazon to process and display the update on the live detail page.
New listings
In Seller Central, check Inactive listings and then Incomplete listings. Add any remaining business or offer information Amazon requires before launching the product.
Ready to publish
Move the finished batch into Seller Central
Publishing access and credit usage depend on your Perci plan. The current account and billing screens show the terms that apply to your workspace.
Start publishing with Perci →